
PARROT SWING TRANSFORMING OPTICAL FLOW SENSOR DRONE
Parrot Swing Transforming Optical Flow Sensor R/C Drone, retail $35.00* (www.parrot.com...)
Manufactured by Parrot (www.parrot.com)
Last updated 10-24-19
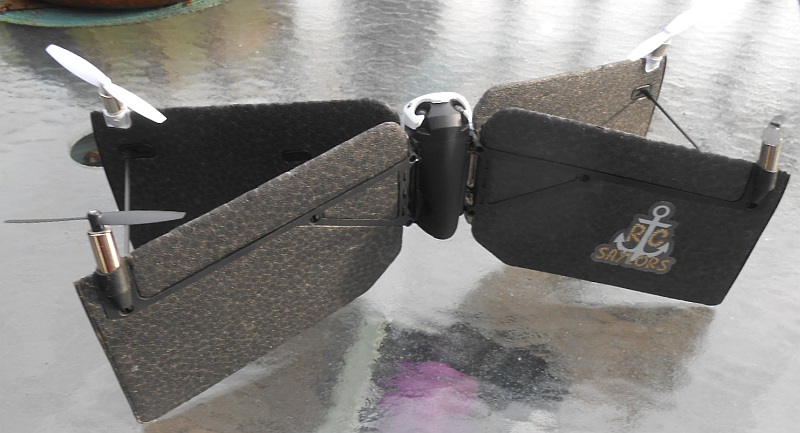
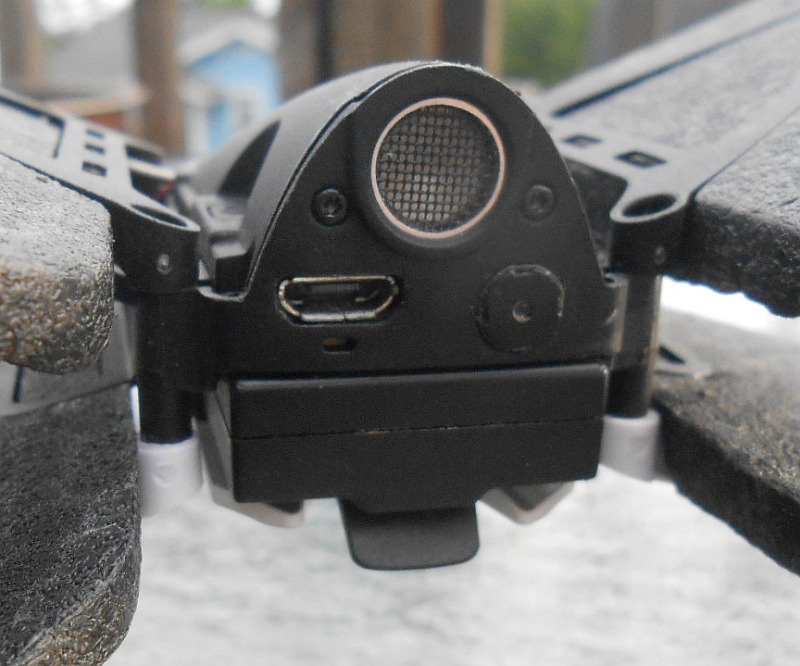

The Parrot Swing Transforming Drone is an incredible little quadcopter with a big-league twist: you can take off and fly it around as you would most other R/C quads, but at the touch of a button you can have your Swing fly like an R/C aeroplane! And you don't even have to land in order to transform it either -- you just push a button while it's airborne and feel the rush as your Swing goes from vertical flight or even hovering into stunning horizontal flight! (and back instantly to vertical flight if it's too much for you or if it looks like the Swing is going to crash into something).
With the Flypad remote control, it's as easy as 3.14159 (pi) to fly, and it's actually quite fun and enjoyable as well.
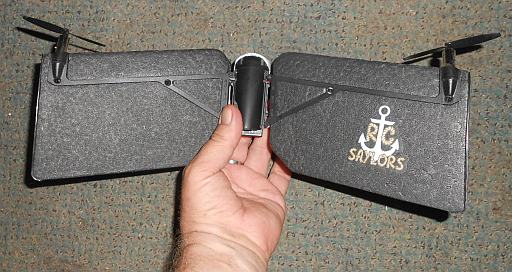 SIZE
SIZE
The TheRCSaylors Sticker that you see was applied by me; please don't expect your Parrot Swing to come equipped with one.
* I chose the version that inclues the Flypad remote control; you can save some $$$ by purchasing the version that is controlled solely with your cellular telephone handset. Since I generally dislike drones that are only controlled via cell phones, I chose the version that came with a physical remote controller.
I've seen them selling for less than $22.00 without the Flypad; while WITH the Flypad I've seen them selling for almost $84.00.

To use your brand spanken new (or corroded old  ) Parrot Swing, first charge the batteries in both the Swing and the Flypad. This applies with ANY rechargeable product, not just the Swing.
Turn the Flypad on by pressing and then releasing that button near the front edge of the Flypad; the button looks a lot like a shiny rectangle with the word, "Parrot" somewhat visible in it. This is the Flypad's POWER button.
Next, install the battery in the Swing quadcopter by inserting it into that hollow rectangle on its bottom. Orient it so that the label on the battery is facing toward the domed part of the Swing, and the three tiny gold contacts go in first. Push the battery in until it clicks in place with both a tactile sensation and a clearly audible snap.
Place the Swing on the ground, orienting it so that the props all face up toward the sky.
Wait a few seconds or so for the Parrot logo on the Flypad and the two LED "eyes" on the Swing itself are steady-on green.
Now, press the, "Auto-takeoff/land" button on the Flypad (this button is the lowermost, central button with the up-arrow and down-arrow embossed into it) and your Swing should now lift off the ground and start hovering there approx. 18" off the ground, as if waiting for you to do something.
Congratulations, you are now a pilot!
Read the instructional materials that come with the Parrot Swing for more info. and tips on how to fly, make the Swing do some tricks, and other related foo-foo.
When the flight battery is getting low, the radio will vibrate in your hands for a few seconds; this is your cue to bring the Swing in closer to you because after approximately one more minute, the radio will once again vibrate, the Swing will automatically return to vertical, and then proceed to land itself wherever it happens to be -- even if it is above a swimming pool (now do you see why I said to bring it close to you after the first vibration sequence?)
When you are finished flying your Swing, turn the radio off by pressing & holding the POWER swich for several seconds, and partially remove the battery from the Swing itself -- you need not pull it all the way out; just pull it out a few millimeters until the Swing's LED "eyes" turn off.

There are no disposable batteries to fuss with changing -- not in the Swing quadcopter and not in the Flypad remote controller either.
However, their rechargeable batteries will need to be charged when they peter out; here's how you do that.
For the Swing quadcopter, install the battery completely into the quad. Plug the small end of the charger cable into the female receptacle on the bottom of the Swing's body, and plug the larger end into any free USB port on your computer or into a USB cellphone charger. A red light will turn on near the charger input receptacle; when this light turns green, you may safely unplug the charger.
Stated charge time is 30 minutes for a 2.1 amp charger; when using a cellphone charger, I think it's pretty close to one hour (60 minutes).
For the Flypad controller, plug the small end of the charger cable into the female receptacle on the back of the Flypad, and plug the larger end into any free USB port on your computer or into a USB cellphone charger. A red light will turn on near the charger input receptacle; when this light turns green, you may safely unplug the charger.
Stated charge time is two hours (120 minutes) but it is not stated as to which charging method is used (most computers limit current through their USB ports to 500mA).
Battery life for the Swing is stated as 7 minutes in quad mode and 8.30 in aeroplane mode; battery life for the Flypad controller is stated as six hours.
Charging time for the flight battery in the Swing was measured at 40 minutes when the product was turned off shortly after the quad's LVC (low voltage cutoff) -- in the Swing's case -- automatic landing occurred. A cellphone charger was used here.

This R/C quad/aeroplane is meant to be used as a toy in a dry area outdoors (or in a large open room indoors), not as a flashlight meant to be carried around all the time, thrashed, and abused; so I won't throw it against the wall, stomp on it, try to drown it in the {vulgar slang term for a fudge bunny}bowl or the cistern, run over it, swing it against the concrete floor of a patio, bash it open to check it for candiosity, fire it from the cannoñata (I guess I've been watching the TV program "Viva Piñata" too much again  - candiosity is usually checked with a scanner-type device on a platform with a large readout, with a handheld wand that Langston Lickatoad uses, or with a pack-of-cards-sized device that Fergy Fudgehog uses; and the cannoñata is only used to shoot piñatas to piñata parties away from picturesque Piñata Island), send it to the Daystrom Institute for additional analyses, or inflict upon it punishments that I might inflict upon a flashlight.
So this section of the drone's web page will be significantly more bare than this section of the web page on a page about a flashlight.
The range of Bluetooth operation is stated as 65 ft (20 m) when using only a smartphone, and 200 ft (60 m) when using the Parrot Flypad remote control.
The Parrot Swing has an optical flow sensor to execute position hold, and an ultrasonic transducer + barometer to maintain altitude hold
If your Parrot Swing ever gets into a condition where the two LED "eyes" glow a solid red even though you know for a fact that the flight battery has a full charge on it and there is subsequently no response from the Flypad (transmitter), remove the flight battery (just slide it out insofar as to where the LEDs go out), press & hold down the Swing's power switch, slide the battery in until it clicks, and keep holding the power switch down for 15 seconds.
What this does is performs a full hardware reset on the Swing, and makes everything reset to factory defaults. This was the factory prescribed fix for my own Swing which showed two red lights shortly after powerup, and would not bind with the transmitter.
An alternate method of resetting your Swing is directly below in the event that the above method results in failure.
First power on the Flypad. You'll see the Parrot graphic on the Power button blink red and then quickly change to a flashing green.
1: Power on the Swing and wait for the eyes to turn a solid green (the LEDs on the Swing itself are referred to as "eyes").
The Flypad LED should now be solid green too.
This indicates the Flypad and the Swing are paired to each other.
2: Hold down the power button on the Swing (eyes go solid red), and then they'll start flashing red (both eyes).
3: After a short while - the flashing will start blinking rapidly.
4: Let go of the of the power button, and the eyes will flash green, and then orange.
5: Once they eyes return to a solid green, the reset is complete.
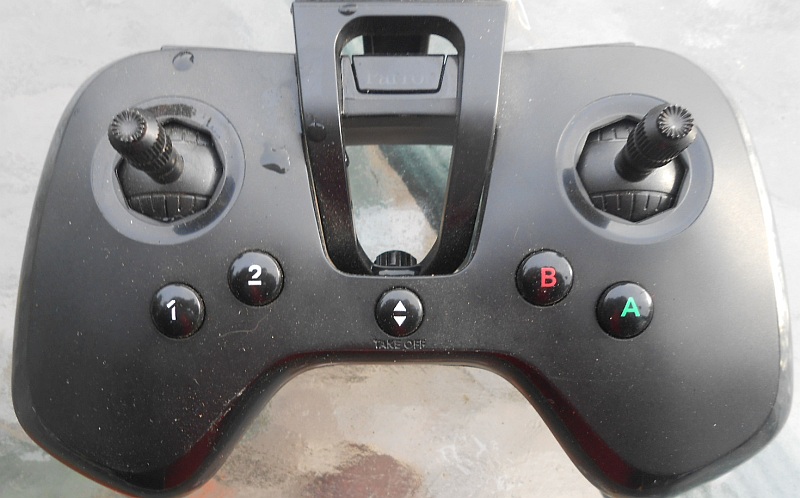
Photo of radio (the dust and junk on it is because I'd already made a number of flights before starting this evaluation).
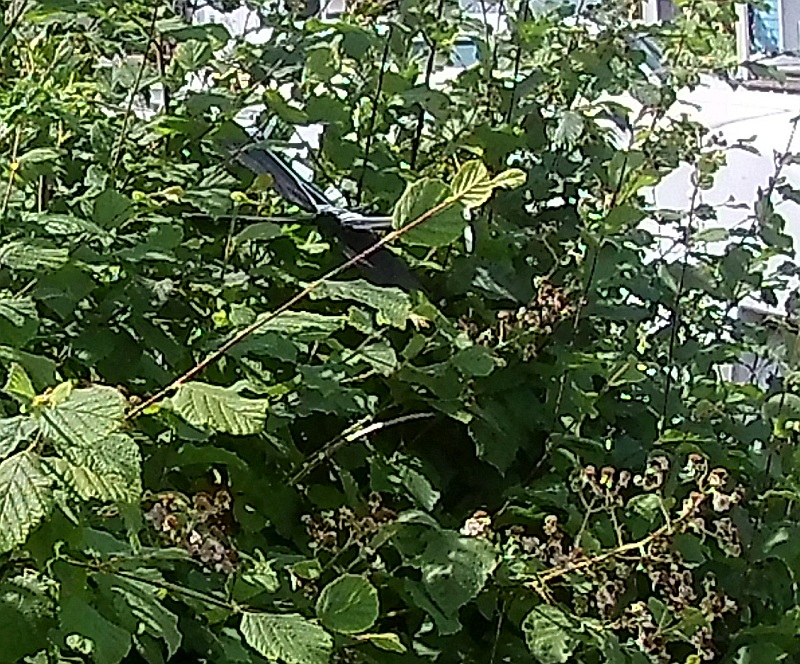
Photograph of the Swing stuck in a high bush after the wind blew it there on 06-20-18; however I was rather easily able to retrieve it with a conveniently-placed poal saw.

ALL OF THE FLIGHT VIDEOS ARE ON THEIR OWN WEB PAGE
SO THAT THIS EVAL. WOULD NOT BECOME TOO CUMBERSOME!!!

TEST NOTES:
Test unit was purchased on Ebay on 05-07-18 and was received at 10:28am PDT on 05-14-18.
UPDATE: 07-04-18
For reasons as of yet unknown, shortly after launch on a flight that I made last night, the Swing "got away" and crashed somewhere on the neighbour's property. I heard a smack sound like it struck something hard, but a careful examination of all sidewalks and other paved and unpaved areas in the vicinity revealed nothing, so I believe that the Swing crashed on a rooftop and as a result is permanently lost. :-(
Therefore, the always-dreadful, " " icon will be appended to its listings on this website at once.
I did purchase another because I like the Swing so much. It should be here by mid-July.
UPDATE: 07-11-18
My Swing was returned to me by a neighbour who found it under a bench on his porch yesterday.
So I charged the battery last night and will test-fly it a bit later today! 
UPDATE: 08-28-18
I love the living tweedle out of the Swing, and it has thus far performed exactly as advertised. So the rating will be going up!!! 
UPDATE: 10-24-19
Product was stolen in Shelton WA. USA while awaiting shipping to me in Fresno CA. USA.
Therefore, the dreadful, " " icon must be appended to its listings on this website, denoting the fact that some true-blue total asshaberdasher has kyped it -- probably to sell for drug money if who I suspect stole it indeed did it.
PROS:
Very easy to fly!
Converts from quad to aeroplane at the touch of a button
Has optical flow & sonar for position & altitude hold -- and they actually work!
Performs exactly as advertised (few products can make this claim!)
NEUTRAL:
CONS:
Seems to be a bit on the fragile side; use care when handling!
No forward-facing camera

MANUFACTURER: Parrot
PRODUCT TYPE: Convertible R/C quadcopter/aeroplane
LAMP TYPE: Bicolor LED, tricolor LED
No. OF LAMPS: 3 (1x bicolor, 2x tricolor)
BEAM TYPE: N/A
REFLECTOR TYPE: N/A
SWITCH TYPE: Pushbutton on/off on quadcopter & Flypad R/C
CASE MATERIAL: Plastic and compressed EPO foam
BEZEL: N/A
BATTERY: 550mAh 3.7v Li:ION (drone), 200mAh 3.7v Li:ION (Flypad controller)
CURRENT CONSUMPTION: Unknown/unable to measure
WATER- AND URANATION-RESISTANT: Very light sprinkle resistant at maximum
SUBMERSIBLE: ¡¡¡EL CONEJITO DE PASCUA CON UN CEPILLO DE DIENTES QUE CAYÓ EN UN HIGIÉNICO DE LOS, NO!!! 
ACCESSORIES: 4x spare props, batteries for quad & R/C, USB charge cable
SIZE: 325mm L x 126mm W x 121 mm D
WEIGHT: 73g
COUNTRY OF MANUFACTURE: USA
WARRANTY: 1 year
PRODUCT RATING:


Parrot Swing Transforming Optical Flow Sensor R/C Drone * (www.parrot.com...)
Do you manufacture or sell an LED flashlight, task light, utility light, or module of some kind?
Want to see it tested by a real person, under real working conditions? Do you then want to see how your light did? If you have a sample available for this type of
real-world, real-time testing, please contact me at bdf1111@yahoo.com.
Please visit this web page for contact information.
Unsolicited flashlights, LEDs, and other products appearing in the mail are welcome, and it will automatically be assumed that you sent it in order to have it tested and evaluated for this site.
Be sure to include contact info or your company website's URL so visitors here will know where to purchase your product.
This page is a frame from a website.
If you arrived on this page through an outside link,you can get the "full meal deal" by clicking here.


 SIZE
SIZE


 - candiosity is usually checked with a scanner-type device on a platform with a large readout, with a handheld wand that Langston Lickatoad uses, or with a pack-of-cards-sized device that Fergy Fudgehog uses; and the cannoñata is only used to shoot piñatas to piñata parties away from picturesque Piñata Island), send it to the Daystrom Institute for additional analyses, or inflict upon it punishments that I might inflict upon a flashlight.


