CESSNA 182 R/C AIRPLANE
This is a long page with at least 40 images on it; dial-up users please allow for plenty of load time.
You have no chance to survive make your time.


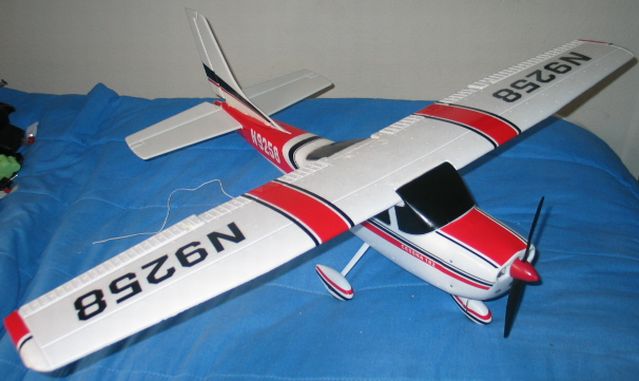
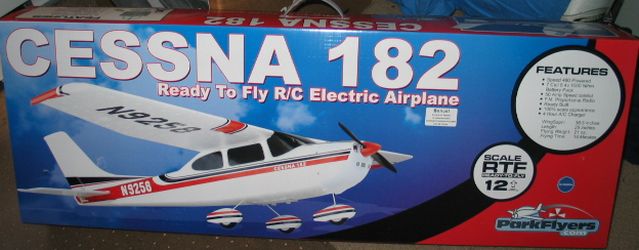
Cessna 182 R/C Airplane, retail $159.99 (www.parkflyers.com...)
Manufactured by (Unknown) for Parkflyers R/C (www.parkflyers.com)
Last updated 07-31-12


This isn't a flashlight, household lamp, Christmas light set, or other thing that glows,but what the hey. I have only evaluated remote controlled (RC) toys several times before, so please bear with me here.

I love things that fly; that's why I took the bate and also why I added a seperate section titled "PRODUCTS DESIGNED TO FLY" on my website.

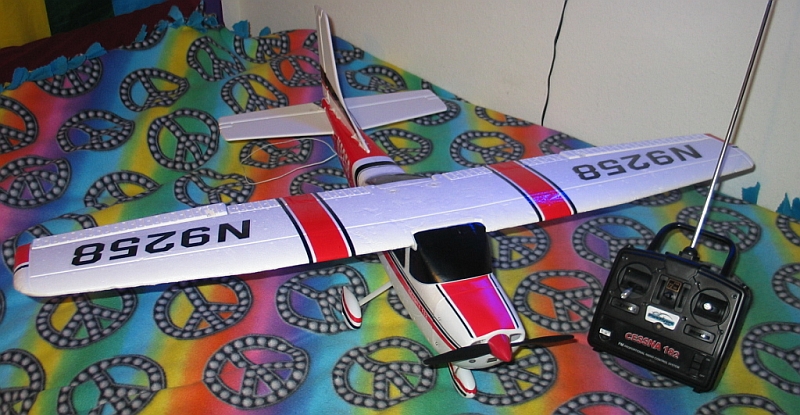
This is a rather large (38.5" wingspan), easy-to-fly remote controlled airplane. It is designed *EXCLUSIVELY* to be flown outdoors - primarily because of its size & speed. Speaking of "speed", this R/C airplane can reach (and even exceed) an astonishing
50mph!!!
This is ***NOT*** scale speed - this is actual speed!!!


 SIZE


This toy (it's quite large, but it could still be called a "toy") is remarkably easy to use for an R/C airplane...here's how to make it fly:

Assemble it first (assembly is a rather complex process; please refer to the furnished instructional materials for this procedure). If desired, affix the included navigational lights to the ends of the wings on their undersides...red light goes on the end of the left wing, green light goes on the end of the right wing.

As with any rechargeable product, charge it first (see directly below), and then you can pretend to fly a dragonfly (well, that's what the kitty cat would think it is if it were designed to be flown indoors - fly it outdoors in a fairly large space relatively free of obstructions like trees or utility poles - a public park is a good place to start here.


Pull up on the antenna on the remote control to extend it.

1: On the remote control, slide the switch below the right-hand control stick toward the front of the remote (toward the antenna); a green LED will come on. Extend the antenna if you have not already done so.

2: Be certain the battery in the airplane is fully charged first; then install it (see below).

3: Place the airplane on a hard surface such as a sidewalk, unused street, or a well-groomed baseball diamond's infield. Orient the airplane so that it faces away from you.

4: Push the left hand stick on the controller forward; the airplane's motor (propeller) should now rapidly throttle up.

5: Direct the antenna on the remote control as vertically as you can. The airplane should rapidly accelerate along the "tarmac"; pull back on the right-hand stick after the airplane has reached maximum speed on the ground; it should then lift off.

Congratulations, you are now a pilot!!!

For additional instructions & tips on how to fly (this is a fairly "complexicated" process!!!!), please read the instructional material that comes with the product.

Turn the remote control off when finished using it.
Same switch as before, but slide it in the opposite direction.
***IMPORTANT!!!*** Remove the battery from the airplane at this point.


The battery in the airplane itself is rechargeable and is not designed to be changed (it does need to be removed for charging, and it can indeed be changed if it poops out - but I'll get to that a bit later); however the batteries in the remote will need to be changed from time to time.

To do this, slide the battery door off & remove it, very gently place it on the ground, and kick it into the garden so the hungry, hungry praying mantids will think it's something yummy for their insect tummies and subsequently strike at it...O WAIT!!! YOU'LL NEED THAT!!! So just set it aside instead.

Remove the eight used AA cells from the compartment, and dispose of or recycle them as you see fit.

Insert eight new AA cells into the compartment, orienting each cell so its flat-end (-) negative faces a spring for it in each chamber.

Finally, place the battery door back on.
Aren't you glad you didn't kick that battery door into the garden with all those hungry, hungry praying mantids now?


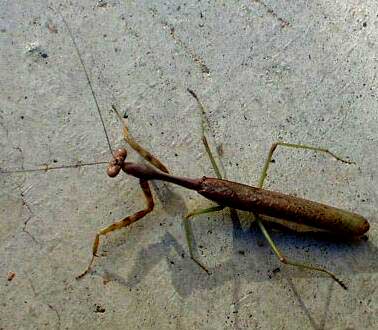
Here is what a praying mantis looks like.
I found this guy on the morning of 09-08-06 clinging to the basket of my scooter.


To charge the battery in the airplane, follow these steps (it's quite simple, actually!):


1: On the bottom of the airplane's fuselage (this word is definitely *NOT* pronounced "
fyoo SELL' uh jee" as Drake Parker from the TV program "Drake and Josh" would pronounce it ) (body), you'll see a vented battery door held in place with two clips. Rotate the clips approximately 100°, lift the front edge of the battery door, and swing it up (it will stay attached).

2: Remove the battery pack from the compartment, and unplug it.

3: Plug the plug on the end of the charger's cord into the plug on the end of the battery's cable, and plug the large part of the charger into a standard (in north America anyway) 110 volts to 130 volts AC 60Hz household receptacle.

4: Charge time is stated as four hours; however, a tag on the charger's cord reads that charge time should be no more than three hours.

5: Reverse the above steps; and there, you're done - though only install the battery pack back in the airplane if you plan to fly it within the next several minutes or so; otherwise leave the battery pack out and swing the airplane's battery compartment door closed with the compartment empty.
See, told ya that it would be easy.


Flying time is advertised as 8 to 13 minutes per charge.


This RC airplane is meant to be used as a large flying toy in a large, dry area outdoors, not as a flashlight meant to be carried around, thrashed, trashed, and abused, so I won't try to drown it in the toliet tank, bash it against a steel rod or against the concrete floor of a patio, let my housemate's citty kats go to the litterbox on it, run over it with a 450lb Celebrity motorised wheelchair, stomp on it, use a medium ball peen hammer in order to bash it open to check it for candiosity, fire it from the cannoñata, drop it down the top of Mt. Erupto (I guess I've been watching the TV program "Viva Piñata" too much again - candiosity is usually checked with a laser-type device on a platform with a large readout (located at Piñata Central), with a handheld wand that Langston Lickatoad uses, or with a pack-of-cards-sized device that Fergy Fudgehog uses; the cannoñata (also located at Piñata Central) is only used to shoot piñatas to piñata parties away from picturesque Piñata Island, and Mt. Erupto is an active volcano on Piñata Island), send it to the Daystrom Institute for additional analysis, or perform other indecencies on it that a flashlight might have to have performed on it. So this section of the web page will be ***SIGNIFICANTLY*** more bare than this section of the web page on a page about a flashlight.

The maximum range of the remote control to the Cessna R/C Airplane is an amazing 2,500 feet (762 meters).
The remote control uses radio waves; not infrared radiation like R/C aircraft designed specifically to be flown indoors.
The transmitter in this particular model operates at a frequency of 72.810MHz. I believe that there is at least one, possibly two additional frequencies available, so that more than one Cessna can be flown in the same airspace simultaneously. These frequencies are governed by crystals on the remote control and on the receiver box inside the airplane's fuselage (body), and may be easily exchanged with another set if necessary.

The body of the Cessna is made of a very lightweight foam (known by most people as Styrofoam®), so it can withstand crashes that a heavier aircraft might be damaged or even destroyed in.

This product is recommended for users of 14 years of age or older; younger children can injure themselves on moving parts or by swallowing something they should not (like an AA cell or one of the spare propellers).

The airplane's motor will continue to operate for ~3 seconds after contact is lost with the remote control - but it *WILL* stop after this time has elapsed.

If the wings on the Cessna airplane become damaged (such as if you graze a tree or something), repairs may rather easily be performed with nothing more than a bit of transparent household tape.

There is a long, thin white wire coming from the back of the airplane;
***DO NOT*** pull, cut, or otherwise remove it!!!
This is the airplane's antenna, and it is absolutely necessary for the wire to be intact for the airplane to maintain contact with the remote control!!!

The flaps, aerilons, and rudder all work, but the propeller does not spin up - not even a little.
If I cannot conduct a successful repair before "press time", I'm afraid that the fairly new (but still dreadful) "" icon will be added next to its listings on this website.


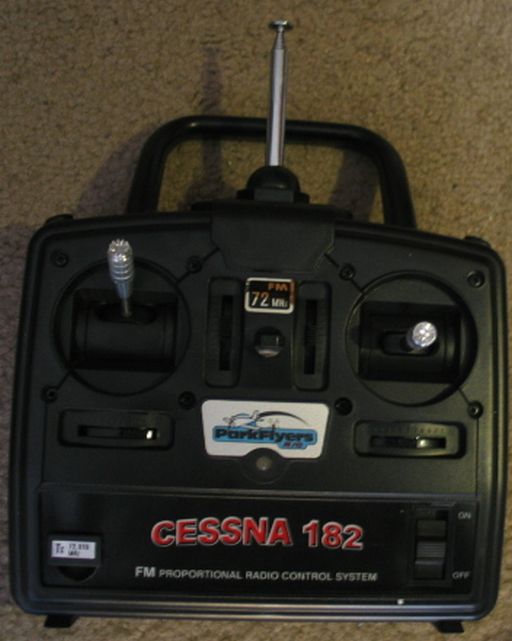
Photograph of its remote control.


Photograph of its battery pack.


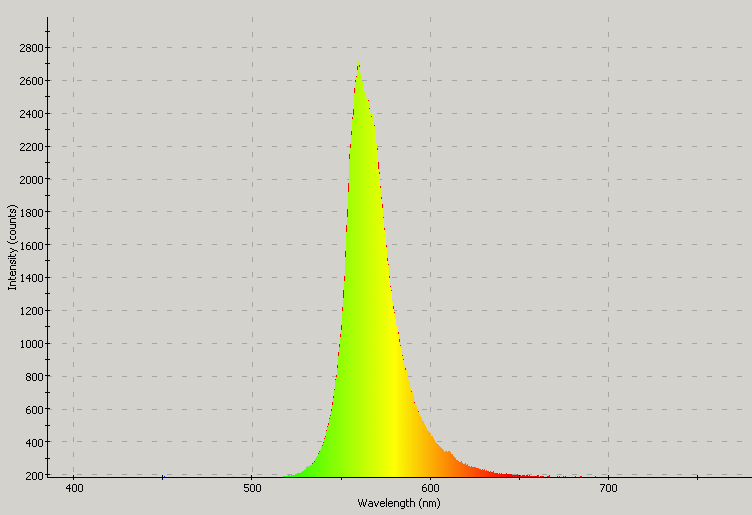
Spectrographic analysis
Spectrographic analysis of the starboard (right) wingtip LED.


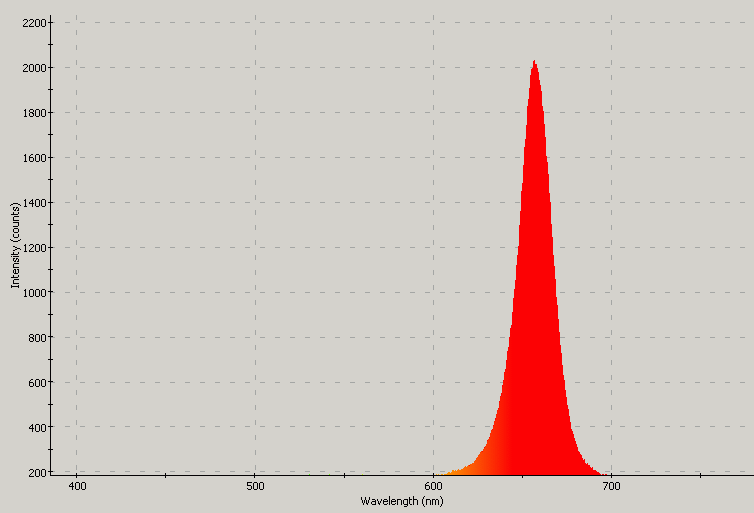
Spectrographic analysis
Spectrographic analysis of the port (left) wingtip LED.
USB2000 Spectrometer graciously donated by P.L.


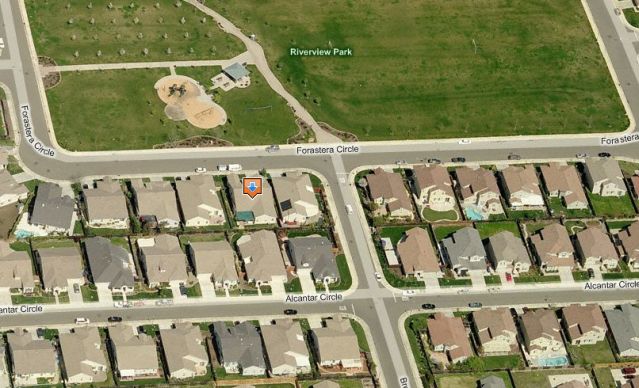
Aerial view of Riverview Park, where I'll make all flights of this airplane.
***IMPORTANT!!!*** The first flight will not take place until after 07-27-08!!!


WMP movie (.avi extension) showing the airplane lifting off the ground and then crashing a short time later.

This clip is approximately 2.79 megabytes (2,812,006 bytes) in length; dial-up users please be aware.
It will take no less than eleven minutes to load at 48.0Kbps.


In this clip, you can hear me say "Flight number three", in the same manner as the speech synthesizer in the coin-op arcade video game ''Looping''.


WMP movie (.avi extension) showing much the same as the previous movie clip.

This clip is approximately 3.58 megabytes (3,756,078 bytes) in length; dial-up users please be aware.
It will take no less than fourteen minutes to load at 48.0Kbps.


In this clip, you can hear me say "Flight number nine" in the same manner as the speech synthesizer in the coin-op arcade video game ''Looping''.


Here is a screen dump (yes, it's really called
that) out of one of the above video clips.
This shows the airplane on the ground shortly before takeoff.


WMP movie (.avi extension) showing the airplane trying - but failing - to take off.

In this clip, you can hear me say "Flight number ten" in the same manner as the speech synthesizer in the coin-op arcade video game ''Looping'', you can see the airplane taxi ok, but it then fails to take off.

This clip is approximately 2.823 megabytes (2,980,578 bytes) in length; dial-up users please be aware.
It will take no less than fourteen minutes to load at 48.0Kbps.


Video on YourTube showing the airplane slowly lifting off & then crashing.
This flight was made near 12:00 noon on 06-20-09.

This clip is approximately 4.9987 megabytes (5,116,888 bytes) in length; dial-up users please be aware.
It will take no less than twenty five minutes to load at 48.0Kbps.

In this clip, you can hear me say "Entering sector one point six" in the same manner as the speech synthesizer in the coin-op arcade video game ''Star Trek'' {it's supposed to be Mr. Spock saying this}, then say "I mean...flight number sixteen", in the same manner as the speech synthesizer in the coin-op arcade video game ''Looping'', followed by the airplane accelerating along a baseball park's infield, lifting off, and being forced to abort shortly thereafter to avoid striking a fence.


This is a screen dump of the video showing the airplane shortly after takeoff.


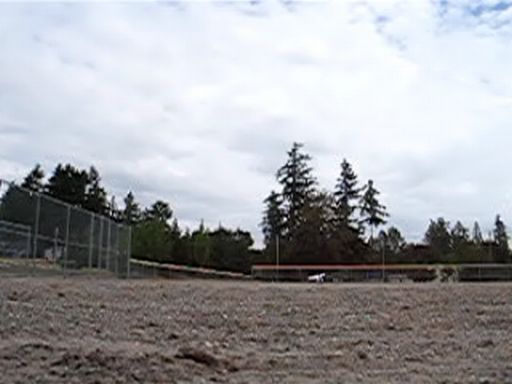
And this is the baseball field I made the above flight in.

This park is *FAR* too small (I have to let up on the throttle to avoid striking a fence); which was one of the primary reasons that I had such limited success here.


Today's video on YourTube is the Syma S107G R/C Coaxial Helicopter vs. the Parkflyers Cessna 182 R/C Airplane.
No, they aren't gonna fly together; I just wanted to attempt a landing of the heli on the airplane's wing.

Figure out who wins...if you said "the airplane" then ¡HUSOOS CRISTO EN UNA MULETA!

I have but one bunghole...er...uh...ONE EYE so I lack depth perception -- which did figure rather dramtically into the final outcome; i.e., the airplane doesn't win -- the heli doesn't win either!

This video is approximately 7.88545632721 megabytes (8,031,029 bytes) in length; dial-up users please be aware.
It will take no less than thirty eight minutes to load at 48.0Kbps.


Today's video on YourTube is the Syma S107G R/C Coaxial Helicopter vs. this airplane.
No, they "ain't" "gonna" fly together (just like yesterday); I just wanted to attempt a landing of the heli on the airplane's wing.

Figure out who wins...if you said "the airplane" then ¡HUSOOS CRISTO EN UNA MULETA!
The heli wins this time -- it successfully lands on the wing!!!

This video is approximately 4.64583458235 megabytes (4,813,801 bytes) in length; dial-up users please be aware.
It will take no less than twenty three minutes to load at 48.0Kbps.


Failed takeoff attempts of the Parkflyers Cessna 182 R/C Airplane.
At least I didn't crash! :-O
Flight attempts took place in a baseball diamond at Celebration Park in Federal Way WA. USA on 07-29-12.
Temperature at flight time was 64°F (17.8°C).

This video is approximately 4.38834536268 megabytes (4,501,935 bytes) in length; dial-up users please be aware.
It will take no less than twenty two minutes to load at 48.0Kbps.

I cannot provide any of these videos in other formats, so please do not ask.


TEST NOTES:
Test unit was ordered via an Ebay listing on the morning of 07-02-08, and was received at 2:47pm PDT on 07-10-08.

Product was DOA so I had to use the fairly new (but still dreadful) "" icon next to its listings on this website; indicating that the product was DOA (Dead On Arrival).

I was certain to use known-new AA cells in the R/C, and I was also certain that BOTH flight batteries were fully charged and each battery pack was tried on multiple occasions...but the poor helpless thing still does not power up its propeller.

Product was made in China.
A product's country of origin really does matter to some people, which is why I published it on this web page.


UPDATE: 07-15-08
I’ve been informed by a technician that I contacted at ParkFlyers R/C that a new speed controller is being sent under warranty.
Since it will require soldering - and my soldering iron has been packed for my 08-01-08 move (though I may purchase one later this morning specifically for this repair!), there is a fairly high probability that I cannot even attempt repairs until after that date - or at least until I receive the replacement controller and solder it in. Therefore, the "" icon will remain up there for at least another week - possibly two.

But the important part here is that I stand a very high chance of having received resolution to this matter!!!


UPDATE: 07-16-08
I ordered another one, just in case I am unable to solder in a confined area (the opening in the fuselage {body} where the motor controller is located). This is to help ensure that I'll be able to fly soon after arriving at my new location!!!


UPDATE: 07-20-08
I received the replacement motor controller on Friday 07-18-08; two of the connectors are plugs - only the third (two wires) require any soldering. So I may very well purchase a soldering iron and attempt to effect repairs because it looks like it will be a relatively simple job.
Actually, since the R/C has already been packed and transported to the new place (along with the soldering iron I already have), I might just wait until after 08-01-08 before conducting this repair.


UPDATE: 07-23-08
The replacement unit arrived at 3:03pm PDT 07-21-08.
I performed a brief test just to be certain the main motor (propeller) works, and it does; so I packed back in its original carton and will assemble it when I move after 07-27-08 (the move was originally scheduled to occur on 08-01-08; but it was moved back to 07-27-08 as of late-afternoon yesterday).


UPDATE: 08-06-08
There is an AC charger port on the remote; this tells me that it's kosher to use rechargeable cells in it.
The total system voltage is 12 volts with alkalines (8 cells) - therefore a charger that outputs 12 volts DC is probably what you want.
Polarity is not shown, but it's very likely the standard "center positive outer barrel negative".


UPDATE: 08-12-08
I began assembling the replacement airplane yesterday morning (08-11-08); and I should be able to take it to the park for its maiden (first) flight within the next several days.


UPDATE: 08-13-08
{vulgar term for having intercourse} Houston, we have a {vulgar term for having intercourse} problem!
The rudder aims significantly to the left, even when the trimmer on the remote control is over as far as it will go.
I have therefore disconnected the control horn (arm) from the rudder and used a known-flexible adhesive to refasten it in a different position - one that allows the rudder to be in a neutral position. Therefore, today's test flight has been postphoned a bit while the adhesive dries - at least until later this morning considering I performed the "repair" on Tuesday morning.

Although this is a rather minor situation, it does directly affect one of the airplane's control surfaces; the plane would not be able to fly or even take off without this repair.


UPDATE: 08-13-08
No, you aren't seeing things.
Yes, a same-day update.
The "jerry rigged" repair I made to straighten the rudder appears - through powered testing on the bed with the main motor off - to have been successful.
The next update you'll see on this web page *SHOULD* include a movie clip of it flying later this morning - *IF* weather conditions allow it and *IF* I feel up to the task that is.


UPDATE: 08-14-08
I made nine flights with varying degrees of success; the limited success I had was *NOT* the fault of the airplane itself (it appears to operate exactly as intended!), but the fault of an inexperienced pilot (me).


UPDATE: 09-05-08
I went to fly it yesterday morning just for Christ sakes, and the sprinklers in the park I was to fly in were on...so the flight was postphoned until no earlier than this morning - if a flight is made later this morning, I'll post another update tomorrow (09-06-08) morning.


UPDATE: 09-06-08
I went to fly it yesterday morning, and could not get it to lift off - this tells me that the flight batteries were probably not fully charged.
So on the charger they went, and we'll see if I have any better results later this morning.


UPDATE: 09-07-08
The flight batteries are charged, but it looks like it needs a little more vertical elevator.
This is an adjustment I can make (the yoke thing can be screwed in or unscrewed to adjust this), but I didn't feel up to making the adjustment and additional flights yesterday morning.


UPDATE: 09-07-08
No, you aren't seeing things.
Yes, a same-day update.
I made the adjustment, and also adjusted the flaps on the main wings so that they're flush with the rest of the wing when the trim adjustment on the controller is set to center. However, by the time this adjustment was made, it was just too hot outside to make for comfortable flying.

The propeller appears to be pushed inwards just slightly (it probably occurred during a crash), but there is no adjustment visible from the outside of the airplane that would move the propeller outward a bit.


UPDATE: 09-07-08
No, you aren't seeing things.
Yes, another same-day update.
I removed the nut, washer, and propeller; and then reinstalled them.
Doing this has apparently gained me the clearance I wanted.

If I make another flight attempt this morning, I'll post my results here.


UPDATE: 09-08-08
It was a little too windy to safely fly this airplane yesterday morning (and by the time the wind died down, it was too hot as well), so I'll try again later this morning.


UPDATE: 09-09-08
I went to fly it yesterday morning to test the adjustments I made, and the sprinklers in the park I was to fly in were on...so the flight was postphoned until no earlier than this morning - if a flight is made later this morning, I'll post another update tomorrow (09-10-08) morning.


UPDATE: 09-10-08
It was a little too windy to safely fly this airplane yesterday morning (and by the time the wind died down, it was too hot as well), so I'll try again later this morning. Exactly like my 09-08-08 update.


UPDATE: 09-11-08
I went to fly it yesterday morning to test the adjustments I made, and once again, the sprinklers in the park I was to fly in were on...so the flight was postphoned until no earlier than this morning - if a flight is made later this morning, I'll post another update tomorrow (09-12-08) morning.


UPDATE: 09-25-08
I went to fly it a couple of days ago, and it still fails to take off from the ground. I shot a video clip of it *NOT* lifting off - though it *DOES* taxi well.

My next course of action will be to increase the pitch of the propeller with a "siggeret" lighter - I have three spares, so if I royally screw the pooch here, I don't have to worry about it.


UPDATE: 09-27-08
I went to fly it yesterday morning to test the adjustments I made, and once again, the sprinklers in the park I was to fly in were on...so the flight was postphoned until no earlier than this morning - if a flight is made later this morning, I'll post another update tomorrow (09-28-08) morning.


UPDATE: 09-28-08
I attempted to fly it Friday anyway, and had only very limited success. It did indeed take off, but very quickly veered off to the left, pitched sharply, and crashed. So I flew another R/C product, just so I'd have something in the air.


UPDATE: 05-05-11
The airplane fell (unpowered) from a height of approximately 4 feet, landed upside-down, and the vertical fin became busted.
Thankfully, I had a spare on hand (from another one of these planes I've been harvesting for spare parts), so ten minutes with a small screwdriver and some white household glue got her good as new again.


UPDATE: 11-15-11
I charged all four flight battery packs so they'll be "ready Freddy" as they say when I fly next year (they'll of course get charged once every couple of months to keep them healthy), and I also conducted a minor repair of the starboard wing mounting assembly -- the receiving part (for the long plastic screw that holds the wing in place) on the plane's fuselage (pronounced "", not "
fyoo SELL' uh jee" as Drake Parker from the TV program "Drake and Josh" would pronounce it ) became loose, so ten minutes of minor work with some Gorilla Glue got things right as rain well in time for my next flight (or "flite" if you prefer).
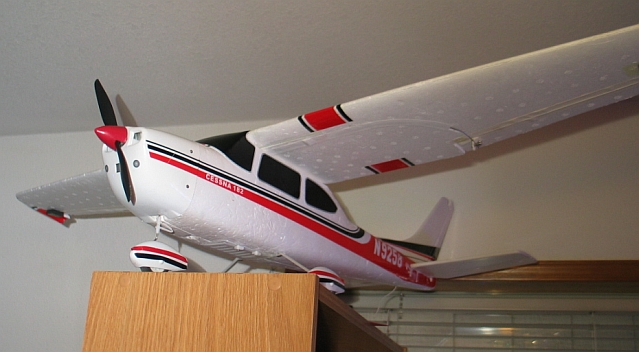

UPDATE: 03-01-12
This is the "hangar" that my Cessna 182 is overwintering in (or "on" in this case):


UPDATE: 05-15-12
I had a great flight going yesterday until I wanted to gain altitude; I pushed the righthand stick on the Tx "up" instead of "down", and the airplane nosedived...or should I say POWERDIVED into the ground, snapping its propeller off, breaking the front landing gear (easily repairable using either the existing wheel or the one from my "parts" airplane) and causing some damage to the cowling...one of the wires even busted off the flight battery -- though I have three spares so that won't keep me grounded. The propeller is another story though; I went to take the one off of my "parts" airplane, but found that it had already been removed. Therefore, the dreadful "Failed or was destroyed during/after testing" icon will be appended to its listings on this website until I can obtain another.
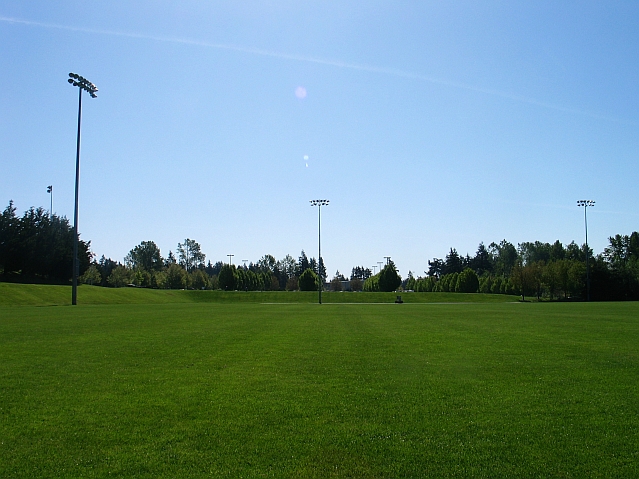
The area of the park I flew in contains two socker fields; the photograph directly below shows but a small part of this locale.


UPDATE: 05-16-12
I attempted a repair of the damaged prop with cyanoacrylate (super glue); a test flight scheduled for later this morning will determine whether it holds up or not.


UPDATE: 05-17-12


This brief video shows the doomed flight of this airplane.
The wind shifted right at launch (after V2 -- before V2 I could have recovered) causing the plane to go into the ground and break off its newly repaired prop (which BTW performed well in static testing). Since I do not have a spare and cannot afford one until July (or even August for Christ sakes!) I'll be grounded for quite a while. :-(

The failed flight took place at Celebration Park in Federal Way WA. USA on the morning of 05-16-12.
Temperature at flight time was 63°F (17.2°C).


This clip is approximately 3.655783458903 megabytes (3,838,788 bytes) in length; dial-up users please be aware.
It will take no less than seventeen minutes to load at 48.0Kbps.


UPDATE: 06-04-12
Four spare propellers have been ordered, so I won't be "grounded" for much longer!


UPDATE: 06-06-12
The propellers arrived yesterday, and I wasted no time in installing one and taking it out front to see how well it taxis (and to adjust the front landing gear so that it taxis straight) -- needless to say, it did very well, so I have no doubts at all that it will be an excellent flier!!!

This means that the dreadful "Failed or was destroyed during/after testing" icon can and will be removed immediately!!!
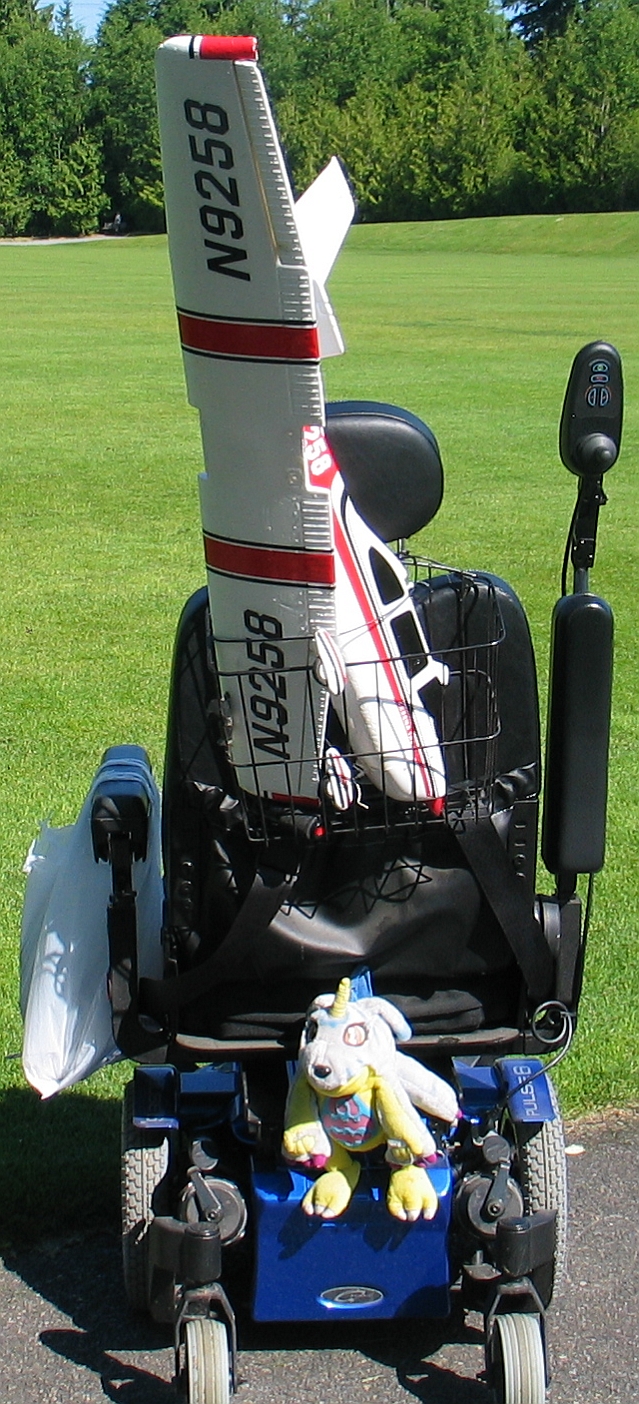

UPDATE: 06-12-12
This is how I transport my Cessna 182 to & from the park I fly it in:


Yes, it looks AND feels a bit "chintzy", but it does the job without breakage or parts loss. I carry the radio, two flight batteries, one spare prop, a standard screwdriver (to affix the wings to the fuselage) and a Crescent wrench (to change out the prop if necessary) in a doubled-up plastic bag on my electric wheelchair's left armrest.


UPDATE: 06-13-12
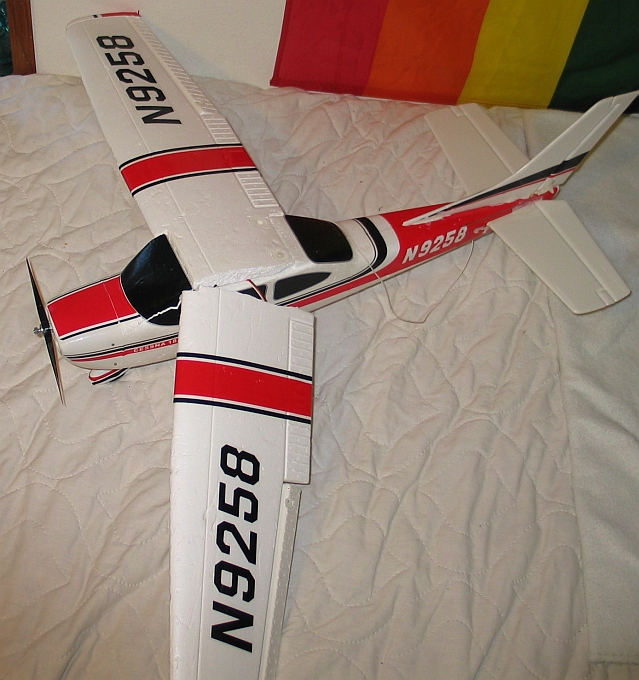
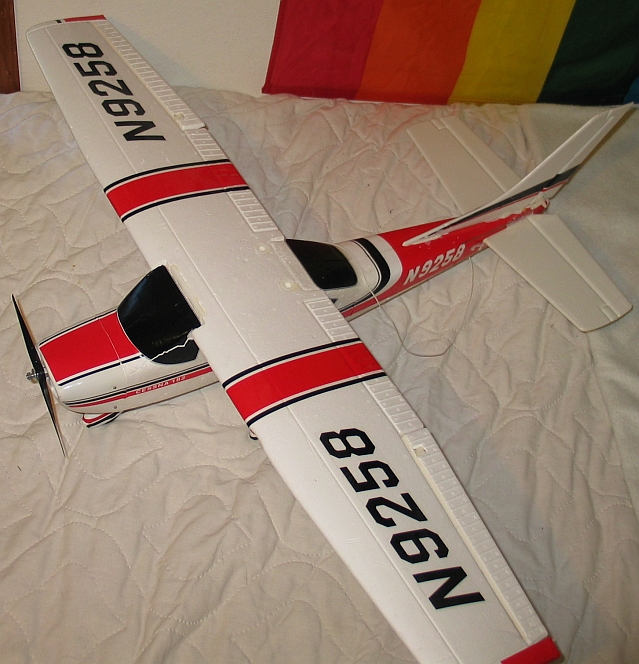
I had a rather serious crash on 06-11-12 that snapped the main wing and bent the propeller shaft; although I was not able to figure out how to swap motors from my "parts" plane to this one, I *WAS* able to bend the shaft back reasonably well with considerable effort on my part; I also took the time to replace the entire front cowling which was rather seriously damaged in another crash I had a couple of weeks ago. I have come to the conclusion that the socker fields I fly my other aircraft in is simply too small to fly this big boy in safely, so I'll have to look for another location which is:

(1): Larger
(2): Has a long paved area so the plane can take off from the ground as intended (vs. being hand-launched).

Here are a couple of photographs; one showing some of the crash damage and the other showing that portion of the repairs.


Before (this is obviously somewhat after the rather destructive crash).


After (the new wing went on slicker than snot as they say).


UPDATE: 06-15-12
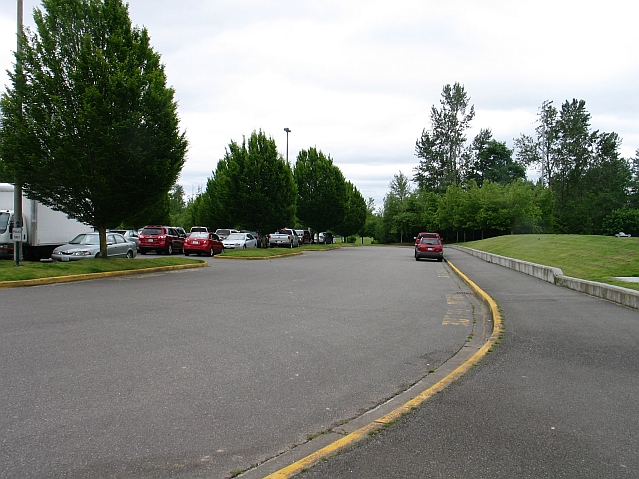
It has been suggested that I might use the park's parking area as a makeshift runway...but there's Big Trouble in Little Edo {obscure Digimon reference here} with that idea.
To wit:


See how it would make a rather lousy runway?
Veer to the right before or shortly after liftoff and ***BAM!!!*** Into that concrete retaining wall (which is approx. 30" {2½ feet} tall).
Veer to the left and ***BAM!!!*** Just hit a parked car or went into the trees -- both could result in wing breakage which could ground me for almost a year!!!


    MANUFACTURER: Unknown
    PRODUCT TYPE: Large R/C airplane
    LAMP TYPE: 5mm LED
    No. OF LAMPS: 2 (1 red, 1 green)
    BEAM TYPE: N/A
    SWITCH TYPE: None
    CASE MATERIAL: Styrofoam & plastic
    BEZEL: N/A
    BATTERY: 8xAA cells (remote), 9.6 volt 1,000mAh NiMH rechargeable (airplane itself)
    CURRENT CONSUMPTION: Unknown/unable to measure
    WATER- AND PEE-RESISTANT: Very light splatter-resistance at maximum
    SUBMERSIBLE: NO WAY HOZAY!!!
    ACCESSORIES: Spare propeller, spare flight battery, AC battery charger, transmitter ribbon, two wingtip lights (red & green) + batteries for them
    SIZE: 29.0"(L) x 38.5"(Wing Span)
    WEIGHT: 21 ounces
    WARRANTY: Unknown/not stated

    PRODUCT RATING:

    R/C ratingR/C ratingR/C ratingR/C rating


Cessna 182 R/C Airplane * www.parkflyers.com...


Do you manufacture or sell an LED flashlight, task light, utility light, or module of some kind? Want to see it tested by a real person, under real working conditions? Do you then want to see how your light did? If you have a sample available for this type of real-world, real-time testing, please contact me at bdf1111@yahoo.com.

Please visit this web page for contact information.

Unsolicited flashlights, LEDs, and other products appearing in the mail are welcome, and it will automatically be assumed that you sent it in order to have it tested and evaluated for this site.
Be sure to include contact info or your company website's URL so visitors here will know where to purchase your product.


WHITE 5500-6500K InGaN+phosphor 
ULTRAVIOLET 370-390nm GaN 
BLUE 430nm GaN+SiC
BLUE 450 and 473nm InGaN
BLUE Silicon Carbide
TURQUOISE 495-505nm InGaN
GREEN 525nm InGaN 
YELLOW-GREEN 555-575mn GaAsP & related
YELLOW 585-595nm
AMBER 595-605nm
ORANGE 605-620nm
ORANGISH-RED 620-635nm
RED 640-700nm
INFRARED 700-1300nm
True RGB Full Color LED
Spider (Pirrahna) LEDs
SMD LEDs
True violet (400-418nm) LEDs
Agilent Barracuda & Prometheus LEDs
Oddball & Miscellaneous LEDs
Programmable RGB LED modules / fixtures
Where to buy these LEDs 
Links to other LED-related websites
The World's First Virtual LED Museum
Legal horse puckey, etc.
RETURN TO OPENING/MAIN PAGE
LEDSaurus (on-site LED Mini Mart)


This page is a frame from a website.
If you arrived on this page through an outside link,you can get the "full meal deal" by clicking here.